How to setup conditional logic for your configurable product:
- Go to the Conditional settings panel
- Add a condition:
Condition structure:
The toolbar: general settings and actions

The condition rules: the rules define what triggers the actions
The condition actions: actions run when the rules are found to be true
Details
The toolbar:
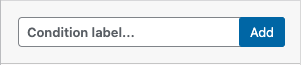
- Condition name
- Enabled – whether the condition is enabled or not
- Make reversible – When enabling this setting, the opposite action will be performed when the condition is FALSE. This is a powerful feature, but it needs to be used with consideration.
For example, avoid using it if several conditions have actions affecting the same elements, as they would then potentially cancel each other. - Always check – By default, the actions on condition is run if the items in the rules are triggered. For example when checking if a choice is selected, the condition will be run if any choice in the same layer is changed.
When Always check is enabled, the condition will be checked at every run instead.
This can be useful when there is a dependency between conditions - Duplicate – Duplicates the current condition
- Delete – Delete the current condition
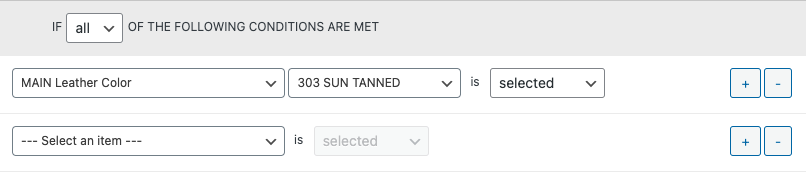
The condition rules:
The rules are set in two parts: the comparison operator: All / Any (Also called And / Or), and the rules themselves.
The rules are made of 3 parts:
- The trigger parent or category – can be a layer, View, or Condition
- The trigger element:
- A layer is selected – the element can be
- A specific choice
- [ Any choice ]
- [ No choice ]
- View is selected – list of the views
- Condition is selected – list of the other conditions
- A layer is selected – the element can be
- The element state – Indicates what to check. The list varies depending on the type of item selected, and should be self explanatory. However, there are a few things to note:
- In most cases, you should check if an item is selected or not selected. In most cases, they should be used instead of using “Is clicked”. Checking the selection will work also when loaded a saved configuration or editing a configuration from the cart, while Clicked only triggers with the touch or mouse events.
- The views should not generally be used in the rules, as they have limited interactivity. The main purpose of their presence is to have the possibility to show or hide views, if they are only relevant for some selection.
You can have as many rules as needed.
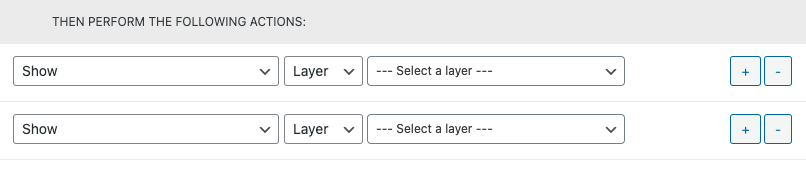
The condition actions:
You can trigger an unlimited amount of actions.
Actions are composed of:
- The action performed
- The element affected by the action
List of available actions:
- Show – shows an element in the configurator
- Hide – Opposite of “Show”: hides an element in the configurator. Hidden elements are disabled and ignored completely.
- Select – selects an element
- Disable – disables an element: the element is still visible, but cannot be selected
- Enable – opposite of Disable.
- Open layer on click
- Deselect – only works for Multiple choice layers, where the user can select and deselect items.
- Reset layer – resets to the default choice, or none, depending on the selection settings
- Sync with layer – synchronises two layers. The layers need to have the same number of choices, and they should be in the same order. If the layers should always be synched, then prefer using the Sync ID setting.
- Show layer in menu – shows a layer in the menu, when that layer was previously hidden in the menu.
- Hide layer in menu – hides a layer in the menu. Unlike the “Hide” action, the layer is still active, the images shown in the viewer, the prices counted and the selection valid in the conditions.
- [new] Save result to use in other condition – for reusable / nested conditions. Allows making complex rules where “Any” and “All” need to be combined
Simple example:
The most common use case a condition will be used is to show / hide a layer depending on a previous selection.
Take the following screenshot:

The layer “Cercle” has 3 choices: Blue, green and orange. When each of this choice is selected, we want to show the relevant options, and hide the other ones.
The easiest way to do this is to have one condition per color.
Each condition will be as follow:

If BLUE circle is selected, Show the Blue color options.
How about hiding the other options?
We do not need to explicitly hide the other options, because we will use a similar rule for each circle color, and make the condition reversible. This will have the effect of hiding the layer if the condition isn’t met.
So the condition in the screenshot above will have the opposite effect if “Cercle > Bleu” is NOT selected. I.E. if the Blue circle options will be hidden automatically.
As we do the same for each color, only the appropriate option will be shown when a color is selected.